

50 Excellent Photoshop Photo Effect Tutorials [Part III] |

- 50 Excellent Photoshop Photo Effect Tutorials [Part III]
- Web Design: CSS Image Sprite with Compass
- Superheroes Wallpapers [Wallpaper Wednesday]
- Collaborate On Design Projects Remotely with GoVisually
| 50 Excellent Photoshop Photo Effect Tutorials [Part III] Posted: 10 Apr 2013 01:27 AM PDT Everyone likes photo effects, especially those that are easy to create and can transform your ordinary shots into stunning artworks. Photo effects will never go out of style. Adobe Photoshop is a superb tool to edit your pictures, so go on and take the best of it. If you’re looking for cool Photoshop guides to follow, this showcase was made specially for you. There are 50 stunning Photoshop photo effect tutorials below ranging from tricks to give your photo the hipster or Instagram filter look, or the tilt-shift (miniature) look, from reducing wrinkles to giving porcelain skin to your subjects. Best of all, all of them are extremely easy and quick. Feel free to choose the guide you like the most and follow it in order to create your own masterpiece! Do check out Part 1 and Part 2 of Photoshop photo effect tutorial collections. 1. Video Tutorial: Enhance Detail Using Correction. This tutorial will lead you through three common ways to apply local tone and color adjustments to your image. 2. Retouch Images with Frequency Separation. In this Photoshop tutorial you’ll learn to retouch an image from start to finish, using a technique that lets you process not only certain image area, but even different detail levels. 3. How to Digitally Add Shadow Depth of Field. This tutorial will tell you how to digitally simulate a shadow depth of field with Photoshop. 4. Video Tutorial: Lomograph. How to Make a Photo Look Vintage & Retro. Learn how to add a retro vintage look to your picture with a cool lomographic effect. 5. Tilt Shift Photoshop Tutorial: How to Make Fake Miniature Scenes. Create a stunning image with Tift Shift effect following this simple tutorial. 6. HDR: Exposure Blending Tutorial. This tutorial will tell you how to achieve a high dynamic range (HDR) version of the image using Photoshop. 7. Video tutorial: Control Tonality with Photoshop’s Black & White Filter. Use black and white processing tricks to enhance your color photos. 8. How to Make Instagram Filters in Photoshop: Earlybird. Create Instagram Earlybird filter following this easy Photoshop tutorial. 9. Photoshop tutorial: Advanced Compositing Techniques. In this tutorial you’ll get to know how to incorporate the elements into one image and get a stunning dreamy poster, inspired by spring. 10. Create a Realistic Photo Composite From a Sketch. In this tutorial you’ll learn to combine a few photos to achieve a realistic scene of the locomotive passing through a desert landscape. 11. Photoshop Tutorial: Wrinkle Reduction. In this guide you’ll find a proper explanation on how to retouch your photo. 12. Black & White Is the Key to Better Color. A brief tutorial on how to improve your color image using black and white. 13. How to Make Your Photos Look Hipster. This cool video tutorial will walk you through the process of adding amazing light lomo effect to your image to make it look ‘Hipster’. 14. An Unmissable Photoshop Tutorial. An awesome video tutorial on how to retouch your image in order to make it look super cool. 15. Photoshop Watercolor Painting Effect. Make your image look like a watercolor painting with Photoshop. 16. Create an Emotional, Molten, Shattered Statue in Photoshop. Use layer masks, adjustments, and a few blending and painting techniques to create a stunning artwork. 17. Create Distorted Typography in Photoshop. In this tutorial a method of distorting typography and working with mixed media to bring a unique look to an image is described. 18. Photoshop Tutorial: Create an Amazing Summer Flyer Design. This guide will teach you to create a summer flyer design combining a few elements into one image. 19. Dazzling Dance Photo Manipulation. In this detailed Photoshop tutorial you’ll get to know how to mix images and to add specific effects to create a smashing artwork. More: 55 Gorgeous Dance Photo Manipulation Artworks and Tutorials 20. Quick Tip: Retroize Your Photos in Seconds. Add a professional retro style look to your image using color layers in Photoshop CS6. 21. Amazing Photo Manipulation “World on the Tissue” in Photoshop. Create a cool wallpaper for your desktop in Photoshop following this guide. 22. Turn Day into Night in Photoshop with Colour-shifted Exposure. Sometimes your camera does not allow you to shoot quality pictures at night hours, so use Photoshop to turn day into night. 23. Video tutorial: Harmonise Tricky Tones and Colours. Use the Color Sampler tool and Curves layers to harmonize two different images together. 24. Enhance Your Image with Selective Color Adjustments. In this tutorial you’ll see a nondestructive process for color editing and image retouching. 25. Video tutorial: Generate a Realistic Heat Haze in After Effects CS6. Learn how to create a realistic heat haze effect in Photoshop for landscape photography. 26. Using Textures & Blending Modes in Photoshop. This Photoshop tutorial will tell you how to use blending modes to adjust textures. 27. Quick Tip: Photographic Tones Good for Photo Re-Touch. Learn how to add Color lookup and Oil painting effects from filter section in Photoshop CS6. 28. Super Cool Watercolor Effect in 10 steps in Photoshop. Use watercolor brushes with Photoshop to create a smashing artwork. 29. Add Quick Effects to Your Personal Photos. This tutorial will walk you through an easy process of adding cool effects to your personal photos. 30. How To Give Your Photos a Dark Processed Lomo Effect. Follow this simple Photoshop guide to give your images a dark lomo style effect with blue tones and high contrast. 31. Dramatic Skin Retouching Technique. In this tutorial you’ll get to know how to use an easy, but effective technique to create a hard dramatic skin effect. 32. Video tutorial: Match Tone and Color in Photoshop. This workflow will walk you through the process of recreating an atmosphere of a vintage film. 33. Instagram Your Images Using Photoshop. An easy and quick guide to add a Nashville effect from Instagram app to your photos. 34. How to Create Extraterrestrial Self Portrait. Learn how to turn an ordinary shot into an amazing artwork with this video Photoshop tutorial. 35. Video tutorial: Fix Frizzy Hair with Photoshop’s Oil Paint Filter. In this lesson you’ll learn how to smooth hair on the picture. 36. How to Create a Porcelain Skin Effect in Adobe Photshop CS6. Create a stunning porcelain skin effect following this Photoshop guide. 37. Instagram Quick Effect In Photoshop. In this Photoshop tutorial you’ll learn how to create a quick Instagram effect. 38. Vintage Yourself! The Easiest Way to Create Vintage Photo Effect. The easiest way to create a smashing retro vintage effect in Photoshop. 39. Video tutorial: Create a Pseudo-HDR Effect with Local contrast. This tutorial covers a simple Photoshop process for creating a local contrast effect in order to achieve a pseudo-HDR look. 40. How I Edited This Photo from Start to Finish. This tutorial will walk you through a procedure of creating an natural sunlight effect in Photoshop. 41. Photo Effects Week: Apply a Color Effect to a Photo. Learn to apply a cool color effect to your personal shots with this Photoshop tutorial. 42. Video Tutorial: Learn How to Recreate The Instagram Nashville Effect in Photoshop. From this video tutorial you’ll get to know how to create a Nashville Instagram effect that can be used for various images. 43. Quick Tip: Create Light Leaks and Lomo Effects Using Actions in Photoshop. In this quick and easy tutorial you’ll learn to add light leak and lomo effect to your favourite pictures. 44. Learn the Secrets of This Before and After: a Photoshop Tutorial. An amazing video guide for photo retouch. 45. Dreamy Photo Effect Tutorial. Give your pictures a dreamy look using gradients and adjustment layers in Photoshop. 46. Dave Hill Photo Effect: Quick Tutorial. A great Photoshop guide to add a stylish Dave Hill’s effect to your images. 47. Video tutorial: Complete the Vintage Toy Camera Aesthetic. Create an old Polaroid effect in Photoshop following this video tutorial. 48. How To Create a Movie Style Photo Effect in Photoshop. Retouch a photo to create an amazing cinematic movie effect with this Photoshop manual. 49. Video tutorial: Frequency Separation Sharpening in Photoshop. In this tutorial you’ll learn how to sharpen your picture using a high-quality frequency separation method. 50. After Effects Tutorial: Create Generative Textures for Print. A cool tutorial to create an awesome collage artwork. ConclusionHopefully, you have found the perfect tutorial to follow and to improve your skills. Don’t hesitate to share your thoughts and final results in the comments section. |
| Web Design: CSS Image Sprite with Compass Posted: 10 Apr 2013 01:29 AM PDT CSS Image Sprite is a method of combining several images into one image file to reduce HTTP requests and optimize web load performance. There are many ways and handy tools to do this, or else you can also do it traditionally with Photoshop. But, through all my experience of dealing with CSS Image Sprite, there is no other way that much easier than using Sprite Function for Compass. So, let’s take a look at how it works. Recommended Reading: Syntactically Awesome Stylesheets: Using Compass In Sass Starting CompassBefore working with Compass codes, we need to create Compass project watch it. So, every time there is a change in the project including the images and the Let’s open your Terminal or Command Prompt (if you are on Windows), and run the following commands. compass create /path/to/project cd /path/to/project compass watch Combining ImagesAs we mentioned above, you can use Photoshop to manually join the images or you can also use some handy tools, such as SpriteBox or SpriteMe. Compass integrates this feature in the Function. Let’s say we have the following icons under images/browsers/<images>.png folders. Icons by Futurosoft To join those icons in Compass, we can use @import "browsers/*.png"; After saving the file, Compass will combine those images and generate new image files, as follows. Layout OrientationFurthermore, we can also set the sprite orientation. As you can see in the screenshot above, the images are arranged vertically by default. In case vertical orientation does not fit the circumstances, we can direct them horizontally or diagonally with the following variable Horizontal $browsers-layout:horizontal; @import "browsers/*.png"; Diagonal $browsers-layout:vertical; @import "browsers/*.png"; Adding Image in the StylesheetOnce we have done combining the image, we add the image in the stylesheet through background image. Traditionally we will do it this way. .chrome { background-position: 0 0; width: 128px; height: 128px; } .firefox { background-position: 0 -133px; width: 128px; height: 128px; } .ie { background-position: 0 -266px; width: 128px; height: 128px; } .opera { background-position: 0 -399px; width: 128px; height: 128px; } .safari { background-position: 0 -532px; width: 128px; height: 128px; } In Compass, we have a couple of ways that are much simpler. First, we can generate something like those CSS rules with this syntax @include all-browsers-sprites; This line above when compiled to regular CSS generates the background image definition as well as each of the position, as shown below. .browsers-sprite, .browsers-chrome, .browsers-firefox, .browsers-ie, .browsers-opera, .browsers-safari { background: url('/images/browsers-sad8e949931.png') no-repeat; } .browsers-chrome { background-position: 0 0; } .browsers-firefox { background-position: 0 -128px; } .browsers-ie { background-position: 0 -256px; } .browsers-opera { background-position: 0 -384px; } .browsers-safari { background-position: 0 -512px; } Or, we can also add background image individually to particular selectors with this syntax li { @include browsers-sprite(safari); } Then, Compass is clever enough to identify the background position, without us having to specify it explicitly. In regular CSS, that line above will turn into .browsers-sprite, li { background: url('/images/browsers-sad8e949931.png') no-repeat; } li { background-position: 0 -512px; } Specifying Container DimensionThe last thing we need to do is specifying the container With Compass, we can utilize this function $height: browsers-sprite-height(safari); $width: browsers-sprite-width(safari); li { display: inline-block; height: $height; width: $width; @include browsers-sprite(safari); } When we compile these codes above, it turns into the following in regular CSS. .browsers-sprite, li { background: url('/images/browsers-sad8e949931.png') no-repeat; } li { display: inline-block; height: 128px; width: 128px; background-position: 0 -512px; } ConclusionThere are actually a few other useful functions from Compass to use along with, but these are all the essential functions to create CSS Image Sprite with Compass. Still, if you are unfamiliar with this subject, we reccommend you to follow our previous post series about Sass and Compass. We hope you find this post to be useful. |
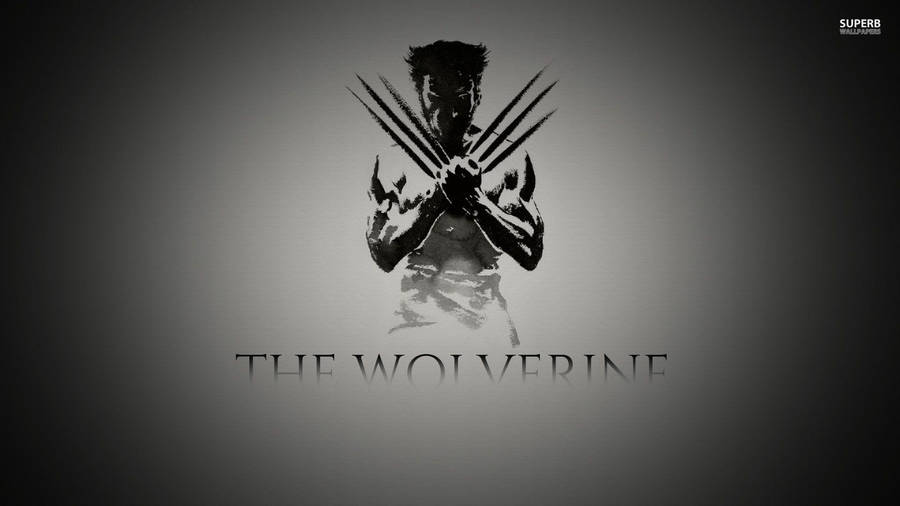
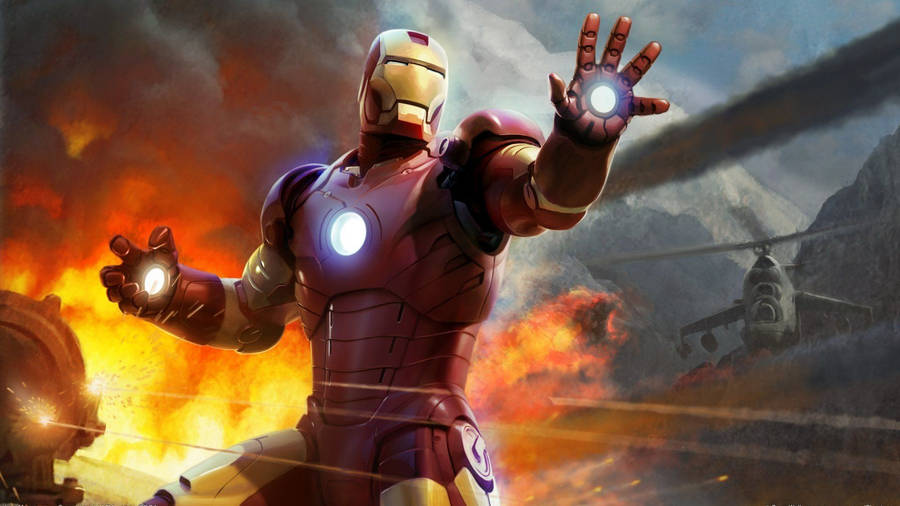
| Superheroes Wallpapers [Wallpaper Wednesday] Posted: 10 Apr 2013 09:22 AM PDT If your first memories of the widescreen cinema is of a cape-wearing superhero, then this will bring back some memories. True, the superhero genre is making a comeback to the silverscreen in recent times with the likes of Superman, Spiderman, Batman, Ironman and the rest of the Avengers, etc. We find it apt to give them a Wallpaper Wednesday tribute as well. This list is supersized for the occasion and we hope you will be able to find your favorite superhero wallpaper. If you didn’t or if you came across a wallpaper that would be great to feature, let us know. Read Also: 40+ Marvelous Comic Superhero Wallpapers Batman Wallpaper. Available in 1920×1200. The Batman III. Available in 1920×1080. Spiderman. Available in 2400×1350. Ripcap. Available in 1280×1024. Superman – Silver S Shield HD Wallpapers. Available in the following size(s): 1280×800, 1280×1024, 1440×900, 1600×1200, 1680×1050, 1920×1200. Download zip. Thor. Available in the following size(s): 480×800, 640×960, 960×544, 800×480, 1024×600, 1024×1024, 1280×1024, 1600×1200, 2048×2048, 2560×1440, 2560×1600. Download zip. The Amazing Spiderman Wallpaper. Available in the following size(s): 320×480, 480×800, 640×960, 1024×768, 1280×800, 1280×1024, 1366×768, 1440×900, 1600×900, 1680×1050, 1920×1080, 2560×1440, 2880×1800. Download zip. The Amazing Spiderman. Available in the following size(s): 640×960, 1024×1024, 1280×1024, 1440×1300, 1600×1200, 2048×2048, 2560×1600. Download rar. Batman Minimalist. Available in 2560×1600. Flash. Available in 2560×1440. Superman. Available in 1759×1235. Wolverine Cartoons. Available in 2560×1920. Green Hulk . Available in 1280×960. You Asked For It. Available in 1920×1200. Hulk Smash. Available in the following size(s): 80×800, 640×960, 960×544, 800×480, 1024×600, 1024×1024, 1280×1024, 1600×1200, 2048×2048, 2560×1440, 2560×1600. Download zip. Here’s more:Spider-Man Wallpaper. Available in 1680×1050. Fly Ironman. Available in 2880×1800. I am Batman. Available in the following size(s): 320x480x, 1024×768, 1280×720, 1280x960x 1440×900, 1680×1050, 1920×1080, 1920×1200. Download rar. Batman. Available in 1920×1200. Mosaic Batman. Available in 1920×1080. Iron Man The Avengers. Available in 2400×1350. Batman Painting. Available in 2000×1125. |
| Collaborate On Design Projects Remotely with GoVisually Posted: 09 Apr 2013 09:28 PM PDT Remote collaboration via email is a pain. It takes time and choosing between Reply and Reply All is sometimes so complicated that some won’t be able to keep up with the discussion. This is not good news for large teams, particularly those that include the clients in the mix. Things could get messy. If you have been facing these problems, I think GoVisually could help you and increase project efficiency. GoVisually is a tool for collaborative working that is designated for people who work in the creative field. So, if you work as a graphic designer or a web designer, this is the tool for you. Starting Your First ProjectWith an account, you can immediately create your project, and add your designs. You get only one project for free, but you can upload unlimited number of designs. Click on the Add new design, then name your design and upload the image. Note that GoVisually only accept image formats like JPG or PNG – uploading a PSD will fail. If you have people working together in your project, they will be notified via their email that you have uploaded a new image design. This is a useful little feature to keep your co-workers and clients on the same page. Working in CollaborationIf you are looking to work in collaboration mode long term, you can add your co-workers and even your clients to the project. There is no limit to how many collaborators can have access to work. Just invite them using their email. Once they accepted your invitation and registered, they will be able to annotate, give feedback, and start a discussion to the designs of the project. You can remove collaborators just as easily once the project is over. Design RevisionIt is rare to find clients agreeing to your preliminary design sketches so revisions are expected. GoVisually allows you to upload multiple design revisions, and better yet compare it to one another. That said, we know that handling revisions is a pain. So, although GoVisually lets you upload multiple images for revision, it’s a better that you limit the allowed number for your design revision when dealing with your clients. AnnotationsIf you have been working with Preview.app in Mac OSX before, GoVisually has (more or less) the same method. You can draw circles, rectangles, arrows, and assign comments directly on your design image. Each collaborator can also reply to exisitng comments. If somehow you have several collaborators inlvolved, there could be a bunch of annotations in your project. Using GoVisually, this would be no problem. Simply, click on the eye icon as shown below to sort out the annotations from particular collaborators. Final ThoughtGoVisually is a good tool with many essential features for collaborative working. But there is room for improvement. Here’s my wishlists:
Whether GoVisually is the perfect tool for you, I honestly have no definite answer. Give it a try and decide for yourself. |


| You are subscribed to email updates from hongkiat.com To stop receiving these emails, you may unsubscribe now. | Email delivery powered by Google |
| Google Inc., 20 West Kinzie, Chicago IL USA 60610 | |
0 comments:
Post a Comment